

Most composite screening problems start at the posts and base rail, not the boards. Skip these steps, and you’re back on site fixing it on your own time.
Installing composite screening is less like building a fence and more like assembling a kit. Boards, rails, clips, and trim all work together as one system — once your posts are in, the rest moves fast.
Why Composite Screening Beats Timber and Colorbond
Composite fence panels replace timber on most projects for three reasons: no rot, no repainting, and a faster install.
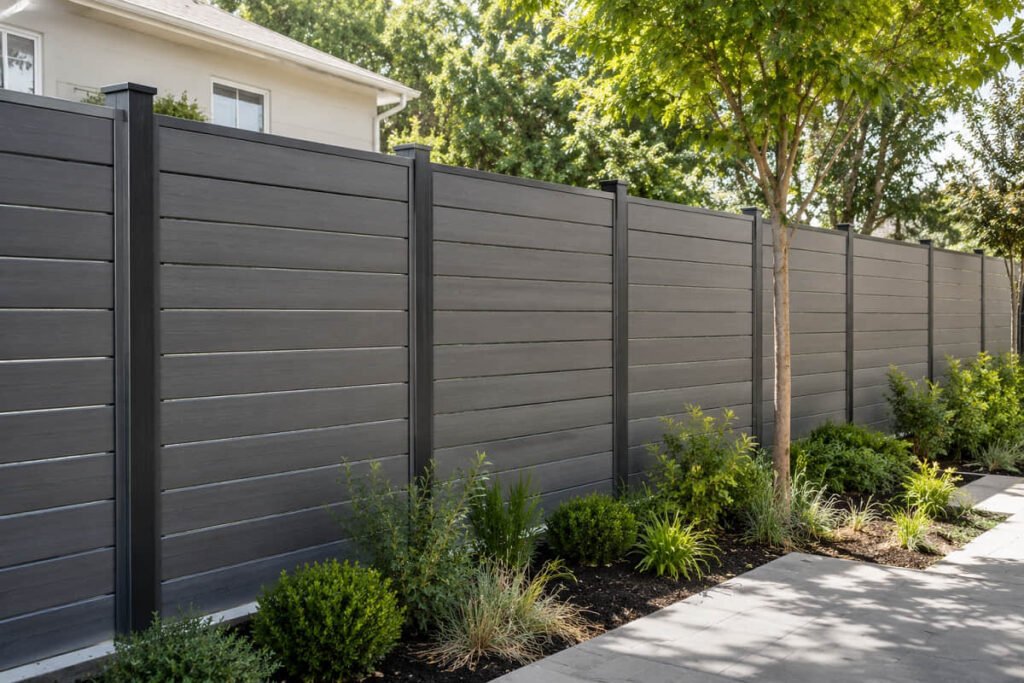
The boards are waterproof, moisture-resistant, and insect-resistant. They carry a 15-year warranty and come in a range of colours with a woodgrain or brushed finish. You can install panels in a closed style for full privacy, semi-open for airflow, or open for a decorative screen effect.
Post spacing of 0.8–1.4 m comes straight from our load testing — so it holds up in real conditions.
Scoping a job and want the full spec sheet first? View our composite screening product to check warranty terms, colour options, and post compatibility before you quote.
What You Need Before You Start
This is a manageable job for two people with basic tools and a free weekend. The key is knowing your system before you start — not halfway through.
Tools You’ll Need
You don’t need specialist tools. Here’s what to have on site before you begin:
- Drill with masonry and wood bits
- Spirit level (1.2 m and small torpedo level)
- Tape measure
- Circular saw, or mitre saw with a carbide-tipped blade
- Rubber mallet
- Spade or post-hole digger
- String line and stakes
- Angle grinder (optional, for steel post cuts)
- Bracket set (supplied with the system — confirm before ordering)
One practical note on drilling: if you’re cutting near a board edge, pre-drill first. Composite boards can crack at cut ends if you drive fixings without a pilot hole. It takes an extra 10 seconds and saves a board.
Know Your System — Rails, Clips, and Trim
Most install guides skip this step entirely. Before a single board goes up, you need to know what each component does.
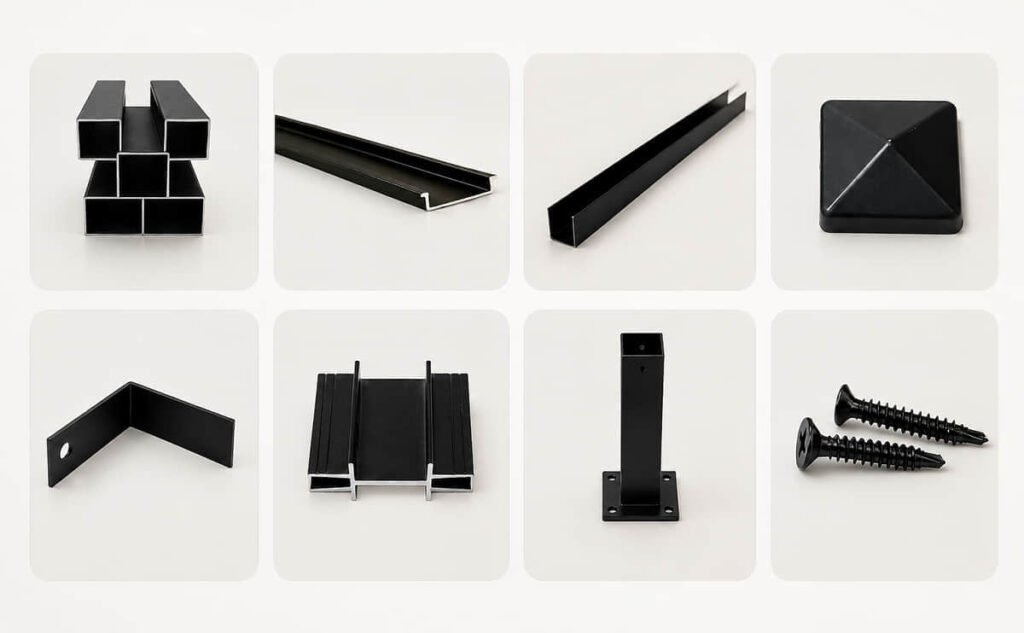
A complete composite screening system includes:
- Base rail — the first structural element after the posts; sits at the bottom of the frame
- Base capping rail — covers the base rail and gives the bottom edge a clean finish
- Aluminium rails — horizontal supports that the boards slot into or clip onto
- Spaced clip fasteners — lock each board in place and set the gap between slats as you work up the run
- Angle brackets — fix the rails to the posts
- Top capping rail — locks the top of the run and finishes the fence
- Post caps — sit at the top of each post and block water ingress
- Post skirts — cover the concrete pad at the base of each composite fence post
- Post edge trims — cover board ends where they meet the post
LastElegance offers every one of these components as part of one complete system. Order the full set from a single supplier, instead of chasing parts from different sources. Request a quote for a full system package — boards, rails, clips, and trim, supplied together.
Prepare the Site
Before you dig, call Dial Before You Dig at 1100. It’s a free service that maps underground utilities, and it’s a legal requirement on most Australian sites. Check your local council setback rules too — boundary fencing rules vary by state and council area.
How to Install Composite Screening Panels: Step by Step
Step 1 — Plan and Mark the Fence Line
Measure the full run and mark each post position with a stake. Start from a fixed point — a wall, an existing structure, or a corner post — so your line stays square from the start.
Post spacing drives the whole layout. The recommended range is 0.8–1.4 m centre to centre, with a maximum of 1.6 m. In exposed or coastal sites, keep fence posts at the tighter end of that range.
Panel width should match your post spacing so board cuts stay predictable. Confirm this before you order.
Step 2 — Set Your Posts
Dig post holes to about one-third of the post height. A 2.4 m post needs a roughly 800 mm hole. Set each post in ready-mix concrete, then check plumb on both faces before the concrete sets. A post that’s plumb on one face but not the other will cause alignment problems when the rails go in.
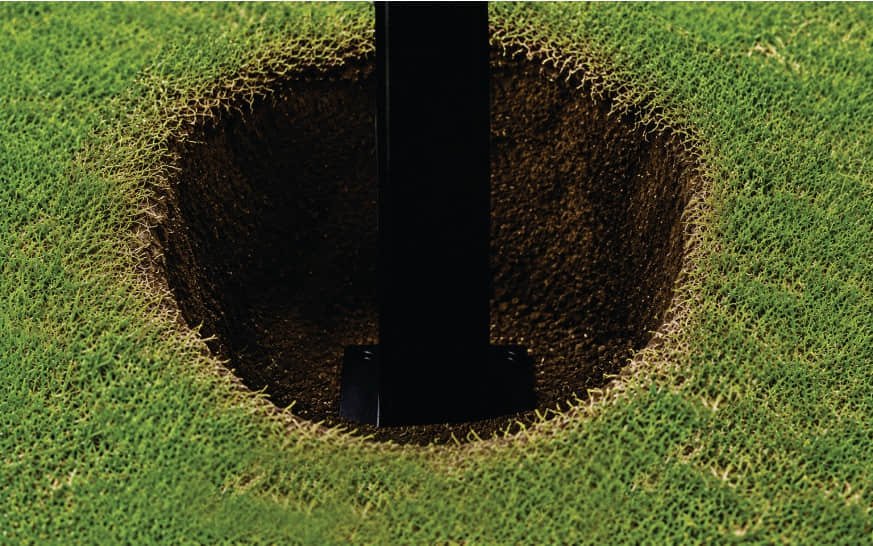

Leave posts to cure for at least 48 hours before loading boards. Most composite fence failures trace back to boards loaded onto posts that weren’t fully set.
Using a grooved post profile for the slot-in system? Make sure the groove faces inward along the fence line. That’s where the board edges engage.
Step 3 — Fix the Base Rail
Once posts are cured, attach the base capping rail using angle brackets. Leave a 10–15 mm clearance gap from the ground. This gap stops moisture from wicking up into the base of the system — skip it, and you’re giving water a direct path in.
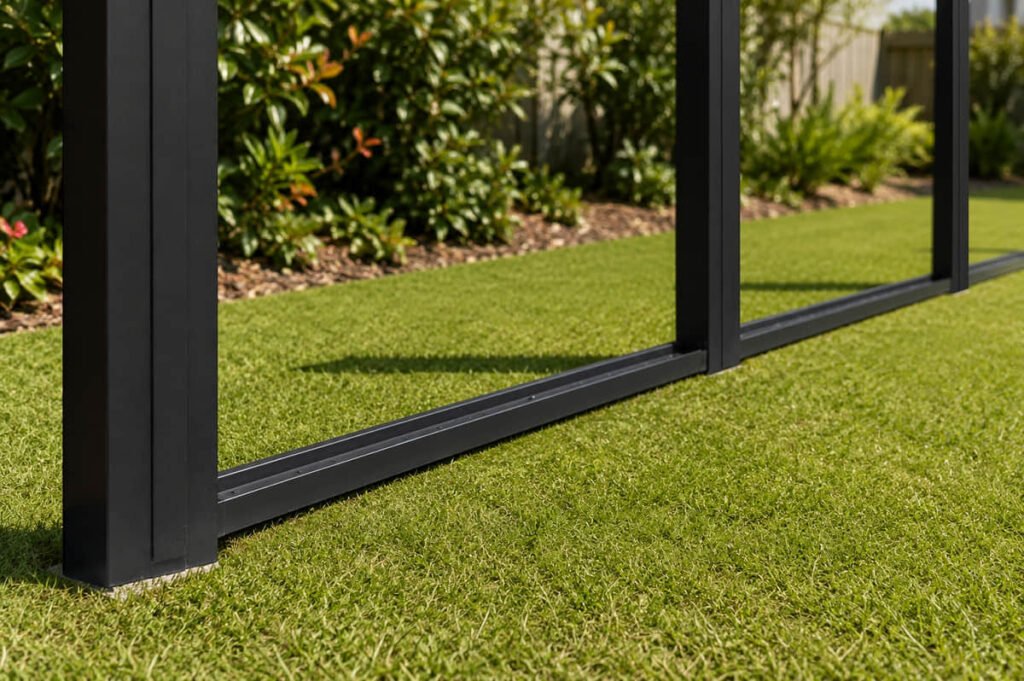
Use aluminium rails at the base where they’re specified. They’re lighter than steel and won’t corrode at ground level where moisture contact is highest. Fix brackets at both ends of each rail span, and check the level across the full run before moving up.
Step 4 — Slot In the Screening Boards
This is where the clip system earns its keep. Feed each board into the groove of the post on either side, working from the bottom up. As each board sits in position, lock it with a spaced clip fastener before adding the next.
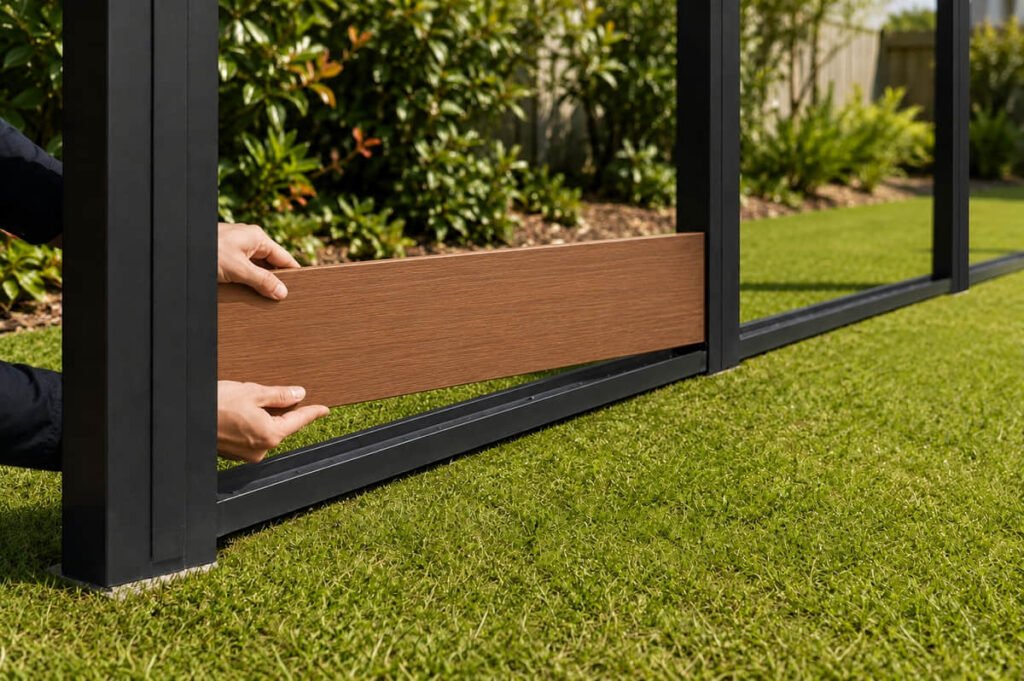
The stainless steel clips do two jobs: they hold the board in place and set the gap between composite fence slats. For a closed install, boards sit tight together. For a semi-open or open decorative screen style, the clip spacers set the gap automatically — no measuring each row.
No face screws needed. The screening material surface stays completely clean.
Keep a spirit level handy as you work up. Small adjustments now are easy. Fixing a run of boards that have drifted out of level is not.
Step 5 — Add the Top Capping Rail
Once all boards are in, fit the top capping rail over the top edge and fix it to the posts. This locks the whole run and gives the top of the screen a clean finish.
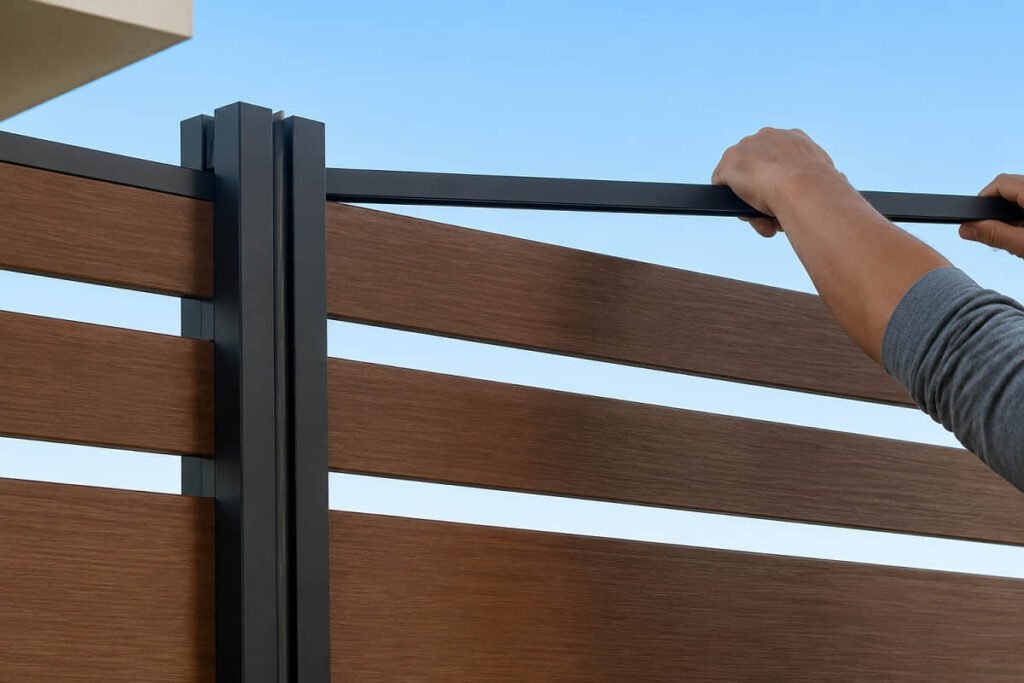
Post caps go on after the capping rail is in place — not before. Get the top rail fixed and level first, then press the caps down over each post.
Step 6 — Fit Post Caps and Edge Trims
Post caps aren’t cosmetic. They seal the top of each post and block water from sitting inside the post cavity. Water ingress at the post top is a real long-term failure point — sealing it takes 30 seconds.
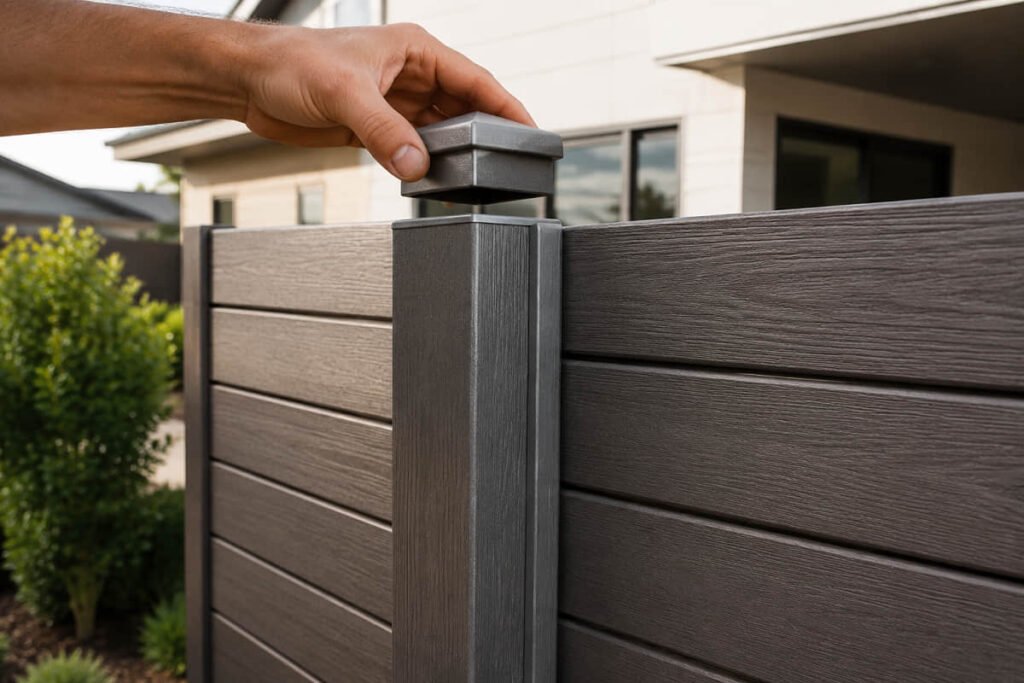
Post skirts go around the base of each post to cover the concrete pad. Edge trims run down the side of any exposed board end at a corner or wall junction. These are part of the complete system — included, not optional extras.
Before you sign off on the job, it’s worth checking the most common composite screening install mistakes — a few of the details in this guide catch out even experienced installers.
Which Post Type Works Best?
Two post options work with composite screening: aluminium alloy or composite. Both use the same rail and board system — the difference is load capacity and visual finish.
| Feature | Aluminium Post | Composite Post |
|---|---|---|
| Wind and load rating | Higher | Moderate |
| Visual finish | Powder-coated metal | Matches board colour |
| Best for | Coastal, high-wind, commercial | Residential, sheltered sites |
| Corrosion resistance | Excellent | Excellent |
Aluminium posts are the stronger choice in coastal areas or open sites where wind matters. Composite posts give a cleaner visual result because the post colour matches the boards — no contrast between post face and fence.
Steel posts can work, but they need composite post inserts to create the grooved channel the boards slot into. Without composite fence post inserts, the boards have nothing to engage with. Confirm insert compatibility before you order steel posts.
Wind and Post Spacing in Australia
Wind is a design factor, not an afterthought — especially in coastal Queensland, WA, and SA. Fence design in Australia generally sits under the wind action guidance in AS/NZS 1170.2, the standard engineers use for structural wind loads.
Post spacing controls how much wind load each panel span can handle. Our spec range is 0.8–1.4 m centre to centre, with a hard maximum of 1.6 m, based on our own product load testing. For exposed sites, aim for 0.8–1.0 m spacing.
Exceeding 1.6 m compromises structural integrity in a strong gust.
One thing to watch: composite screening material acts like a sail in the wind. A closed install — no gaps between boards — catches more wind than a semi-open or open decorative screen. If your client wants full privacy on an exposed site, tighter fence post spacing is the answer. Don’t try to solve a wind problem with better fixings alone.
How Long Does the Install Take?
A standard run goes up in a single day with a two-person crew — that’s not counting the 48-hour post-cure, but the actual board and trim work moves fast.
The clip system is why. Cut boards to length, slot them in from the bottom, clip each one in place, and add trim. It’s assembly, not construction. For contractors, that speed translates to lower labour cost per job compared to timber framing or Colorbond.
Lock in your colour at the order stage — composite screening colour options are confirmed before the job starts, not on site. Get samples to your client early and confirm before you order.
Contact our sales team to discuss volume supply, lead times, or custom colour options.
Frequently Asked Questions
Is composite screening a DIY weekend project?
Yes — two people can finish a standard run in a day. The slot-in clip system is straightforward, and no specialist tools are required. The only real time constraint is the 48-hour post cure before you start loading boards.
Can composite screening panels go on steel posts?
Yes, but steel posts need composite post inserts to create the grooved channel the boards slot into. Without composite fence post inserts, there’s nothing for the boards to engage with. Confirm system compatibility before you order your posts.
Can composite screening be used on a porch or covered area?
Yes — composite screening works well in pergolas, patios, and covered porch areas. The material is moisture-resistant and won’t warp in sheltered conditions. In covered applications, posts fix to a structural frame using post bases rather than going in-ground.
What gap should I leave between composite screening boards?
For a closed installation, boards sit tight together with no gap. For semi-open or open styles, clip spacers set a consistent gap between each board — the clip type you use determines the spacing. There’s no freehand measuring needed.
Do composite screening panels need to be sealed or treated?
No. Composite screening doesn’t need staining, sealing, or painting. The co-extruded cap layer protects the board surface from UV and moisture. A hose-down or mild detergent wash is all the regular upkeep it needs — and colour stays stable without any treatment.
Whether you’re scoping a single residential fence or pricing a multi-site commercial run, the full composite screening system ships together — boards, rails, clips, and trim — so there’s no chasing parts from multiple suppliers.
Request Free Samples to check colour and finish before you order.
