

Get the install wrong, and the callback costs more than you saved on labour. Most problems — bowing boards, open joints, early wear — trace back to the subframe, not the boards themselves.
This guide shows you how to install composite cladding properly, start to finish. It covers wall prep, the batten subframe, board fixing, trims, and expansion gaps.
LastElegance composite cladding uses a clip-based male-female system. No face screws, no surface holes — just a clean finish. Get the subframe right, and two installers can clad a feature wall in a day.
What Tools and Materials Do You Need?
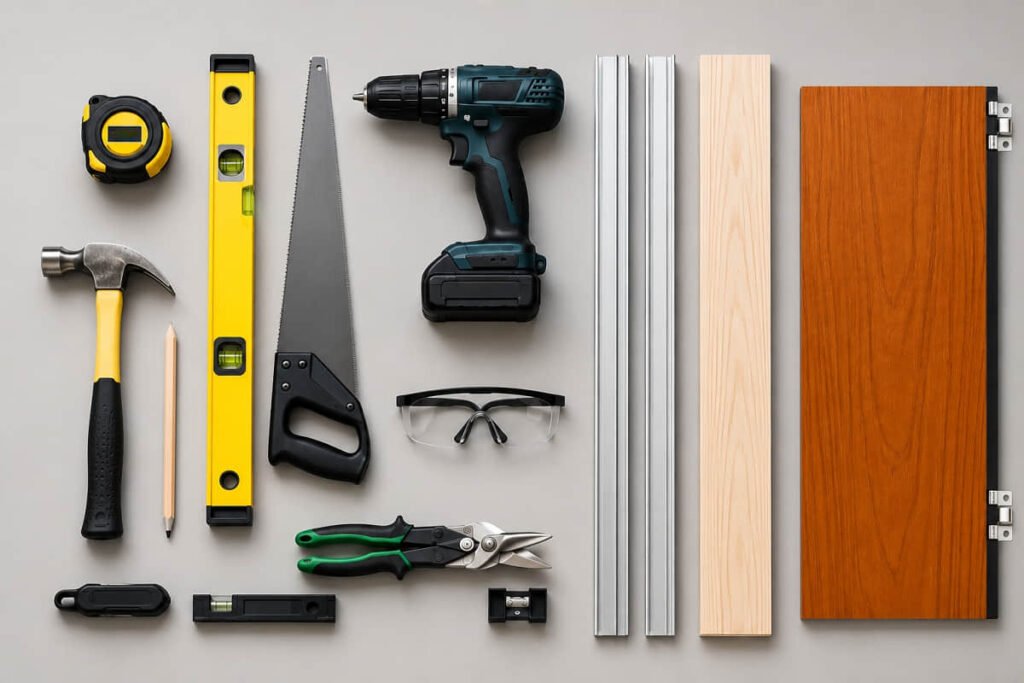
Standard carpentry tools are all you need. No specialist gear required.
Tools
- Tape measure
- Spirit level and chalk line
- Mitre saw (for crosscuts) and circular saw (for lengthwise cuts)
- Drill/driver
- Pencil or marking gauge
- Safety glasses and hearing protection
Materials
- Composite cladding boards — confirm profile and length with your product specs
- Clip fasteners
- Stainless steel screws for batten fixing (corrosion-resistant, essential in coastal and high-humidity areas)
- Aluminium or steel battens — preferred over timber in wet or exposed zones
- Breathable moisture barrier membrane
- Corner trims, top and bottom trim strips, and angle brackets
- Post caps and post edge trims, where the design calls for them
Check your product specs sheet for the correct clip type before ordering.
How Do You Prepare the Wall?
Three things must be right before a single batten goes up: the wall must be structurally sound, clean, and dry.
Check for cracked render, soft spots, or any movement. Fix these first. Cladding won’t mask a structural issue — it’ll just make it harder to reach later. Clear any loose paint, old fixings, or debris from the surface.
If the building sits in a designated bushfire zone, check your BAL rating and NCC requirements before you start. Some fixings and batten materials may be restricted in higher BAL zones.
Never fix composite cladding boards directly to masonry or brick. The boards need a ventilated air gap behind them. This lets moisture drain and air move freely. Our trade partners along the Queensland coast see the same pattern on project after project. Moisture trapped behind cladding is one of the most common causes of early wear they get called back to fix.
A breathable membrane between the wall and the batten subframe is best practice on any cladding project, especially near the coast or in high-rainfall areas. It adds a second layer of protection and keeps the wall in good shape behind the boards.
How to Fix the Batten Subframe
This is the most critical stage. Get the subframe wrong, and every board above it will show it.
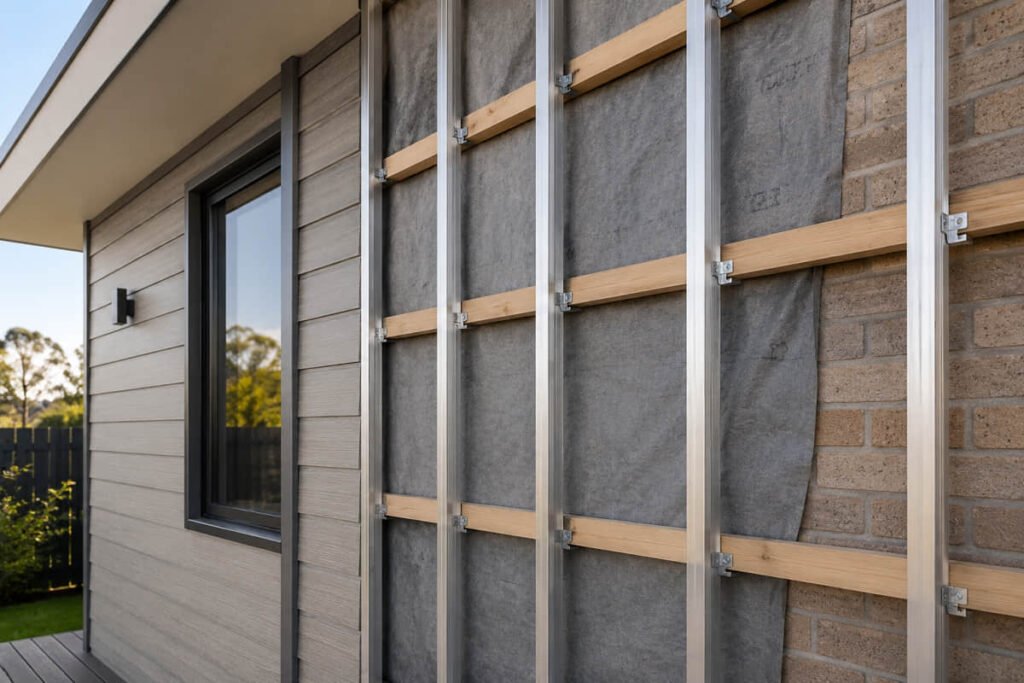
Batten direction: Run battens perpendicular to the boards. Horizontal cladding boards need vertical battens. Vertical boards need horizontal battens.
Recommended spacing: 300–400 mm centre-to-centre for LastElegance composite cladding. DecoGroove boards weigh up to 2.93 kg per linear metre, so spacing can tighten toward 300 mm for that profile. Check the data sheet for your specific board. Correct spacing keeps boards fully supported and keeps the install within warranty conditions.
Air gap: Leave at least 20–25 mm between the wall surface and the back of the battens. This maintains airflow, prevents moisture from building up, and lets any rainwater that gets in drain out cleanly.
Here’s the step sequence for fixing the subframe:
- Mark your batten positions with a chalk line. Use a tape measure to set even spacing from the top to the bottom of the wall.
- Check each batten with a spirit level before fixing — both vertically and across the wall face.
- Fix battens into the wall structure or joists using stainless steel screws. Don’t anchor into render alone.
- For aluminium or steel battens, use self-drilling screws rated for exterior use. Aluminium holds up much better than timber in coastal and high-UV areas — it won’t swell, split, or corrode.
- Step back and check the full layout once all battens are in. Every batten should sit flush. This is what makes or breaks the finished wall.
Horizontal or Vertical — Which Should You Choose?
Both work. The choice is mostly about looks.
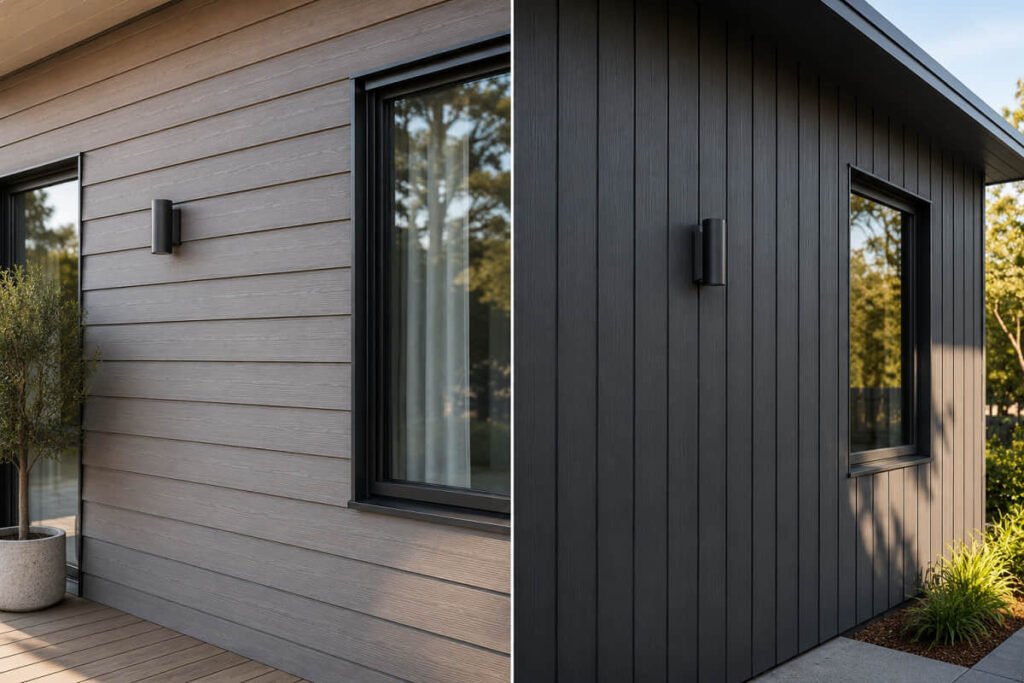
Horizontal installation is the standard for most residential and commercial facades across Australia. It gives a classic weatherboard profile that suits a wide range of projects and has a more traditional look that clients recognise. Vertical installation suits modern and industrial designs — it’s a common choice on commercial fit-outs where strong vertical lines are part of the brief.
The practical difference is just the batten direction. The subframe must always run perpendicular to the boards, whichever way you go.
What Is the Laying Pattern and How Does It Affect the Job?
The laying pattern is how the boards sequence from the base of the wall up.
Always start at the bottom and work upward. Each board sits over the one below it, so water sheds away from the wall rather than behind it. For LastElegance composite cladding boards, the male-female interlocking system locks each board into position as you climb. Set the first cladding board dead level at the base of the wall, and every board above takes its cue from it. The system removes the guesswork on alignment.
Installing the Cladding Boards
Work from the bottom up. A level first board makes every board after it easier and faster to place.
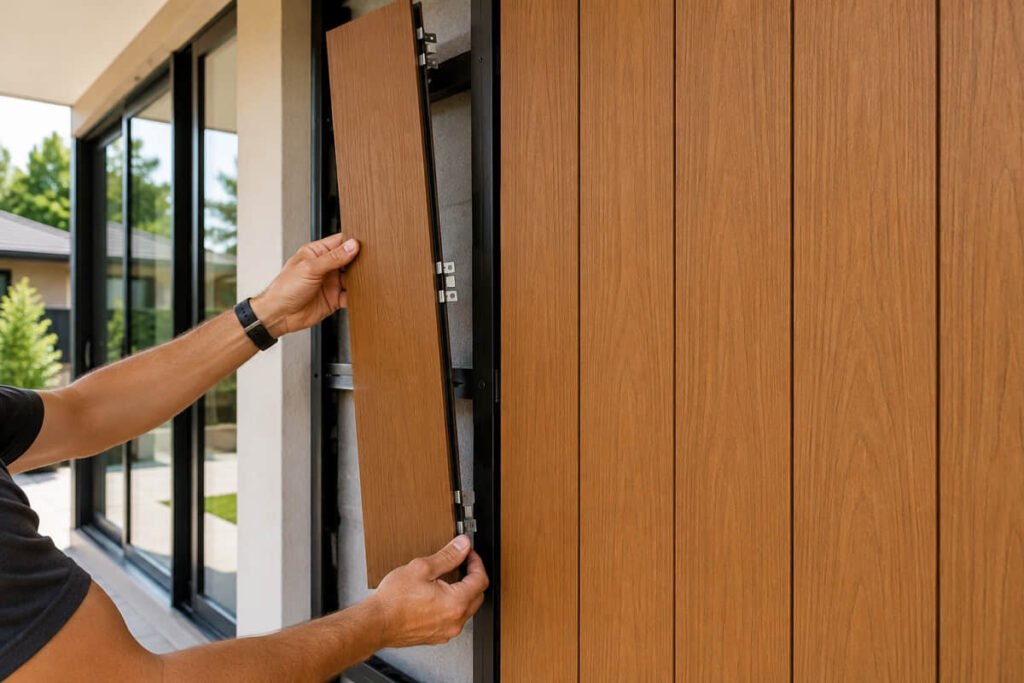
- Fix the starter clip to the batten at the base of the wall. This holds the bottom edge of the first board in position.
- Set the first board. Mark your starting height and snap a chalk line across the wall — don’t use the ground as your reference, it’s rarely level enough. Seat the board into the starter clip and check it with a spirit level. Even 2–3 mm out of level here will compound across the whole wall, so take your time.
- Clip the board to the batten using the stainless steel clips supplied. No screws go through the board face.
- Slide the next cladding board down over the tongue of the board below. Push it firmly until it clips into place.
- Continue up the wall, checking level every 3–4 boards.
- Measure and cut remaining cladding boards to fit as you reach windows, door openings, and the edges of the wall. Leave expansion gaps at each board end — see the expansion gap section below.
- Fix the top board last, trim to the correct height, and fit the top trim strip.
No surface screws means no visible fixings. The wall looks clean from the first board to the last. Installation videos are available from our team if your crew wants a full walkthrough before starting.
Colour looks different on site than it does on screen. Before you order the full run, request a few free samples to check them under real light.
Cutting Boards to Fit
A mitre saw handles most crosscuts — trimming boards to length around windows, door frames, and at the top of the run. A circular saw is better for longer lengthwise cuts when you need to rip a board down to fit under a sill or along a roofline.
Composite boards cut cleanly with standard carpentry saw blades. Cut edges don’t need sealing. A fine-tooth blade reduces chipping on the board face, which matters on visible cuts near windows and corners.
Measure twice before you cut. Fit corner trims and fascia boards over any exposed cut edge — they cover minor variation and give the job a neat finish throughout.
Fitting Corner Trims and Finishing Pieces
Corner trims and finishing strips are what take a good install and make it look professional. Every exposed cut edge on a cladding project should be covered.
The full trim system for a LastElegance composite cladding installation includes:
- Top and bottom trim strips — cap the top edge and finish the base of the wall
- Corner trims — cover both external and internal corners cleanly
- Angle brackets — secure the trim to the subframe
- Post caps and post skirts — for designs with posts
- Post edge trims — finish the edge return at corners or post positions
Cut all trim pieces to length on site using the same saw you use for boards. Because the trim system is made to match the cladding range, profiles and colours line up — no mixing parts from different suppliers, no colour mismatches to explain to the client.
Every accessory in this system has its specs listed in our full product catalogue. That means no hunting through separate spec sheets.
Expansion Gaps — Why Australia Is Different
Most installation guides mention expansion gaps. Few explain why they matter more here than in Europe.
Composite material expands and contracts with temperature. In the UK or northern Europe, the thermal swing a board sees across a full year is modest. In Australia — especially inland Queensland, WA, or the Northern Territory — surface temperatures on a north-facing wall can push past 60°C in summer. That’s a much wider thermal cycle than most European product specs are built around.
Leave a gap at each board end and wherever boards meet a fixed element — window frames, door frames, posts, and corner trims. For LastElegance composite cladding boards, treat the minimum recommended gap as exactly that: a minimum, not a target. In warmer climate zones, go wider.
Skip the gaps, and the boards push against each other during thermal expansion. The result is bowing, buckling, and pressure on the clip fixings. Moisture also collects more readily in a tight board run, and that affects durability over time.
Under the LastElegance 20-year warranty, missed expansion gaps count as incorrect installation — and that’s not covered. It’s simple to get right during the build. It’s expensive to fix after.
For a full breakdown of what to watch for, see our related guide: common mistakes when installing composite cladding.
Frequently Asked Questions
Can you use normal screws for composite cladding?
Corrosion-resistant screws are the right choice for fixing battens to the wall — stainless steel screws are standard in Australian coastal and humid conditions. For the boards themselves, the hidden clip system means no screws go through the board face at all. The surface stays clean.
Do you need council approval to install cladding in Australia?
In most cases, adding or replacing cladding on an existing building doesn’t need a Development Application. But this varies by state and local council — always check before you start, especially on commercial buildings or heritage-listed properties.
Do composite cladding boards need a moisture barrier behind them?
A breathable membrane is best practice, particularly on masonry or brick walls in high-rainfall or coastal areas. The batten subframe already creates an air gap that supports ventilation and drainage — the membrane adds another line of defence.
How long does it take to install composite cladding?
For a straightforward feature wall or single-storey section, two people working with the LastElegance clip system can usually finish in a day. Corners, windows, and roof lines all add time, so a full house re-clad will take longer.
Is there a difference between installing regular and slatted composite cladding?
The core process is the same — battens, clips, bottom-up sequence. The key difference is board width and the visual gap between boards on slatted profiles. This affects your linear metre count and how corner trims are fitted at each end.
Does incorrect installation affect the warranty?
Yes. The 20-year warranty covers normal use. Damage from incorrect installation — missed expansion gaps, wrong fixings, or unsupported board spans — is not covered. Always follow the installation guide supplied with the product.
Talk to our sales team if you’ve got a project ready to go. They can also help if you’re still working out the details — specs, samples, custom builds, all of it.